
Why Does a Blind Rivet Nut Spin After Installation?
Common Causes and 7 Troubleshooting Checks
Blind Rivet Nuts (also known as Rivet Nuts or Nutserts) are commonly used in thin sheet metal, enclosures, automotive components, furniture, aluminum extrusions, and equipment assemblies. They provide internal threads in sheet materials and can be installed from one side of the workpiece.
However, a common installation issue occurs when a blind rivet nut rotates together with the bolt during tightening. This may prevent the bolt from being properly tightened or make it difficult to remove. This condition is often referred to as blind rivet nut spinning or spin-out.
A spinning blind rivet nut does not necessarily indicate a defective fastener. The issue may be related to hole dimensions, sheet thickness, grip range, installation settings, or bolt tightening conditions.
The following seven troubleshooting checks and explanations can help identify possible causes.
7 Checks When a Blind Rivet Nut Spins
- Thread Size: Confirm that the blind rivet nut and bolt have compatible thread specifications.
- Hole Size / Geometry: Verify that the installation hole diameter and shape meet the selected rivet nut's specifications.
- Sheet Thickness: Measure the actual sheet thickness rather than relying only on the nominal drawing value.
- Grip Range: Confirm that the actual sheet thickness falls within the specified grip range.
- Body Style: Check whether the Round, Knurled, Half-Hex, or Full-Hex body style is suitable for the hole geometry and assembly requirements.
- Installation Conditions: Inspect the installation tool, stroke, pulling force, and the rivet nut's deformation after setting.
- Bolt Tightening Conditions: Review the bolt specifications, tightening torque, and assembly procedure.
If the cause remains unclear after these initial checks, examine the following three areas in greater detail.
1. Sheet Material and Installation Hole Conditions
Incorrect Hole Size or Geometry
The installation hole plays an important role in securing a blind rivet nut to the workpiece.
- Oversized hole: Insufficient contact between the rivet nut and the hole wall may reduce resistance to rotation.
- Undersized hole: Forcing the rivet nut into the hole may damage the fastener body or deform the sheet material.
- Irregular hole geometry: Oval holes, inconsistent hole shapes, or oversized holes caused by worn drilling tools may affect installation quality.
Before installation, verify the hole diameter, geometry, and machining quality against the selected product specifications.
Sheet Thickness Outside the Grip Range
Each blind rivet nut has a specified grip range, which defines the sheet thicknesses it is designed to accommodate.
If the sheet is too thick, the blind side of the rivet nut may not deform sufficiently. If the sheet is too thin, the fastener may not develop the intended clamping condition.
Therefore, product selection should be based on the actual sheet thickness and the manufacturer's specified grip range, not solely on thread size.
Sheet Material and Surface Conditions
The material properties and surface conditions of the workpiece may also affect the installed fastener's performance.
- Soft sheet materials: Aluminum, copper, and certain plastics may experience localized deformation around the installation hole under load.
- Surface coatings: Powder coating, paint, e-coating, and plating may change the contact conditions between the rivet nut and the workpiece.
- Burrs or contaminants: Burrs, oil, and cutting fluid residue around the hole may interfere with proper seating and contact.
The actual effects depend on the material, coating, fastener specifications, and installation conditions.
2. Blind Rivet Nut Installation and Setting Conditions
Insufficient Setting During Installation
During installation, the blind rivet nut is pulled to deform its blind-side body and clamp the sheet material.
If the setting process is incomplete, the fastener may not achieve the intended clamping condition.
Possible causes include:
- Installation tool stroke set too short.
- Insufficient pulling force from pneumatic or electric installation tools.
- Worn mandrel threads affecting installation performance.
- Incomplete operation of a manual installation tool.
The installation settings and the final deformation of the rivet nut should be checked according to the product and installation tool specifications.
Incorrect Installation Tools or Procedures
Installation quality may also be affected by tool compatibility and operating procedures.
Examples include:
- The tool mandrel does not match the rivet nut thread specification.
- The rivet nut flange is not seated flat against the sheet surface.
- An unsuitable mandrel or nosepiece is used for the selected fastener.
Confirm that the installation tool and its accessories are compatible with the blind rivet nut being installed.
3. Bolt Tightening and Assembly Conditions
Improper Tightening Torque or Assembly Procedure
In some cases, a blind rivet nut may appear properly installed but begin spinning during subsequent bolt tightening.
When this occurs, check the following conditions:
- Whether the applied tightening torque exceeds the installed rivet nut's resistance to rotation.
- Whether an impact driver or high-speed tightening tool generates excessive peak torque.
- Whether an excessively long bolt causes interference or bottoms out.
- Whether cross-threading creates abnormal tightening resistance.
- Whether repeated assembly and disassembly may have affected the joint.
If spinning occurs only during bolt tightening, both the installed rivet nut and the bolt assembly conditions should be evaluated.
Actual Troubleshooting Experience
- Panel or assembly situation: The sheet material and the structure of the Blind Rivet Nut, such as serrations or wedge head design for extra grip. The nut body shape, round or hex, is also noted.
- Problem found by the customer: The Blind Rivet Nut spun after installation.
- Cause found by our engineers: The sheet material was too hard, so the nut could not bite into it (no interference between the sheet and the nut). In other cases, the tightening torque was too high, causing the nut to slip and spin.
- Corrective action: Add serrations, switch to a hex body nut, or use a wedge head Blind Rivet Nut. All of these increase spin resistance and prevent the nut from slipping.
What Information Is Needed to Troubleshoot a Spinning Blind Rivet Nut?
Blind rivet nut spinning may result from several interacting factors. Thread size or visual inspection alone may not be sufficient to determine the cause.
If the problem persists after the initial checks, prepare the following information for further evaluation:
- Blind rivet nut part number and thread size
- Sheet material and actual thickness
- Installation hole diameter and geometry
- Installation tool and setting conditions
- Bolt specifications and tightening conditions
- Photos of the installed rivet nut and the observed issue
These details can help determine whether the problem is associated with fastener selection, hole preparation, installation procedures, or subsequent assembly.
Blind Rivet Nut Products and Technical Inquiries
Selecting a suitable blind rivet nut involves more than choosing the correct thread size. Sheet material, grip range, installation hole requirements, and assembly conditions should also be considered.
If you are evaluating blind rivet nuts for your application or experiencing spinning after installation, contact Super Nut with your drawings, specifications, and assembly requirements for further product evaluation.
Related Products: Blind Rivet Nut Series
Contact Us: Contact Super Nut / Send Your Inquiry
- Related Product
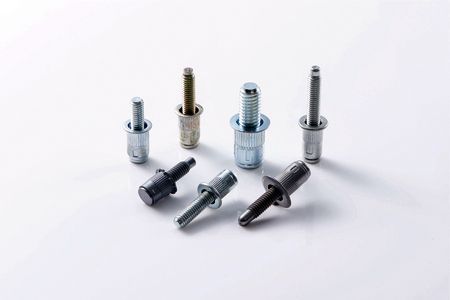
Blind Rivet Studs
A Blind Rivet Stud provides all the features of the blind rivet nut, plus the addition of the threaded...
Details